Arlecchino is a 5-star Pyro character in Genshin Impact. In this comprehensive Arlecchino build guide, we’ll break down her talent priorities, recommended weapons and artifacts, and the best team compositions to maximize her potential. Arlecchino is set to rerun in Version Luna II, if you plan to pull for her, don’t forget to visit Lootbar.gg for exclusive discounts on your next purchase!
Enjoy up to 22% off on Game Top-Ups.
3-Minute Delivery for Non-Stop Gaming.
Trusted 4.9/5 on Trustpilot, 10/10 among Players.
Official Partnership Route, Protect Your Game Wallet.
Arlecchino Character Profile
-
Arlecchino Information
| Character Information | ||
Arlecchino |
Rarity | ★★★★★ |
| Element | ||
| Weapon |
|
|
| Progression Bonus | CRIT DMG +38.4% | |
| Combat Role | DPS | |
 Polearm
-
Arlecchino Gameplay
Arlecchino is a DMG dealer who uses the Bond of Life to gain offensive buffs. She can use her Elemental Skill to apply Blood-Debt Directives to opponents hit and use her Charged Attack to recover Blood-Debt Directives and obtain the Bond of Life. When the Bond of Life reaches a certain percentage of her Max HP, Arlecchino's Normal Attacks will be converted to deal Pyro DMG as well as deal increased DMG. Her Elemental Burst deals AoE Pyro DMG, removing the remaining CD on her Elemental Skill and restoring her HP.
Arlecchino Talent Priority
Below are the best talent priorities for Arlecchino in Genshin Impact:
| Talent | Priority |
| Normal Attack: Invitation to a Beheading | ★★★★★ (Top) |
| Elemental Burst: Balemoon Rising | ★★★ (Medium) |
| Elemental Skill: All Is Ash | ★ (Low) |
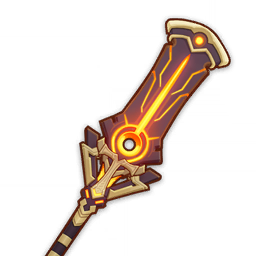
Arlecchino Best Weapons
As a DPS character who scales with ATK, any sword that boosts Arlecchino’s CRIT stats or ATK will be a strong choice for her. The following are some recommendations.
| Best Choice | ||
| Signature Weapon |
Crimson Moon's Semblance (5★) |
|
Welkin Moon for just $2?—Claim Yours Now!
Blessing of the Welkin Moon
Limited-Time Offer: $2 |
$4.99
P.S. This is a limited-time offer from LootBar, exclusively for LootBar's new users! Only 200 Blessings of the Welkin Moon are available—first come, first served. Don’t miss out—claim yours now!
If all Welkin Moons have been claimed, you’ll receive a 10% OFF coupon instead.
| 5-star Alternatives | ||
| 1st |
Staff of the Scarlet Sands (5★) |
|
|
2nd |
Primordial Jade Winged-Spear (5★) |
|
| 3rd |
Staff of Homa (5★) |
|
| 4-star Alternatives | ||
|
Option 1 |
Deathmatch (4★) |
|
|
Option 2 |
Sacrificer's Staff (4★) |
|
| Option 3 |
Missive Windspear (4★) |
|
| 3-star Alternative | ||
|
Option 1 |
White Tassel (4★) |
|

Arlecchino Best Artifacts & Stats
When it comes to artifacts, the Fragment of Harmonic Whimsy set is the optimal choice for maximizing Arlecchino’s damage. Alternatively, the Gladiator’s Finale set works well if you prefer a different option. For beginners who haven’t yet farmed a full set, a hybrid combination of 2-piece Gladiator’s Finale or 2-piece Wanderer’s Troupe provides a solid and effective choice.
★ Artifacts
| Best Choice | |
|
Fragment of Harmonic Whimsy |
|
| Alternative Choice | |
|
Gilded Dreams
|
|
| Beginner Choice | |
|
Gilded Dreams
|
|
|
Shimenawa's Reminiscence |
|
★ Recommended Stats
Here are the best Artifact main stats and sub-stats for Arlecchino in Genshin Impact:
| Artifact Main Stats | Sands: ATK% |
| Goblet: Pyro DMG Bonus | |
| Circlet: CRIT Rate or CRIT DMG | |
| Artifact Sub Stats |
CRIT Rate & CRIT DMG > ATK% > others |
Arlecchino Best Team Comps
Due to Arlecchino's versatile gameplay, she excels as a Main DPS in a variety of team compositions, including Vaporize, Melt, Mono Pyro, and Overloaded teams.
1. Arlecchino Vaporize Teams
In Vaporize teams, Arlecchino benefits from strong and consistent Hydro application, making Yelan and Xingqiu ideal partners. Other viable support options include Bennett, Xilonen, Kaedehara Kazuha, or Zhongli.
| Main DPS | Hydro Enabler | Support | |
|
|
 Yelan (5★) |
Bennett (4★) |
|
|
|
Xingqiu (4★) |
Bennett (4★) |
|
|
|
Xingqiu (4★) |
Bennett (4★) |
|
|
|
Xingqiu (4★) |
Bennett (4★) |
|
2. Arlecchino Melt Teams
In Melt teams, Arlecchino requires Cryo enablers who can apply Cryo off-field. Citlali plays a strong role here, providing off-field Cryo application along with powerful buffs for Arlecchino.
| Main DPS | Cyro Enabler | Support | |
|
|
|
Bennett (4★) |
 Xilonen (5★) |
|
|
Citlali (5★) |
Bennett (4★) |
 Kazuha (5★) |
|
|
Citlali (5★) |
Bennett (4★) |
Rosaria (4★) |
3. Arlecchino Mono Pyro Teams
In Mono Pyro teams, you can pair Arlecchino with another Pyro sub-DPS, such as Xiangling, to maximize the team’s overall damage.
| Main DPS | Sub DPS | Hydro Applier | Support |
|
|
|
Bennett (4★) |
Xilonen (5★) |
|
|
Xiangling (4★) |
Bennett (4★) |
Kazuha (5★) |
|
|
Xiangling (4★) |
Bennett (4★) |
Zhongli (5★) |
4. Arlecchino Overloaded Teams
In Overloaded teams, Chevreuse is almost a must-have support. Additionally, you’ll need an Electro Sub-DPS to trigger these reactions and activate Chevreuse’s buff. Fischl or Yae Miko are solid options for this role.
| Main DPS | Sub DPS | Support | |
|
|
|
Bennett (4★) |
Chevreuse (4★) |
|
|
Yae Miko (5★) |
Bennett (4★) |
Chevreuse (4★) |
|
|
Fischl (4★) |
Thoma(4★) |
Chevreuse (4★) |
Arlecchino Constellations
Arlecchino’s base potential at C0 is already impressive, offering solid damage output. However, to fully unlock her power and elevate her performance, focusing on specific constellations is key. We highly recommend prioritizing C1, C2, and C6 for the most significant improvements.
-
C1 Explanation
C1 further enhances Arlecchino’s Masque of the Red Death, while also increasing her resistance when she performs Normal or Charged Attacks while affected by the Masque of the Red Death. This reduces her reliance on shields or sustain-focused support.
-
C2 Explanation
C2 provides Arlecchino with an additional high-multiplier AoE Pyro damage, directly boosting her damage output. At the same time, it upgrades the Blood-Debt Directives, optimizing Arlecchino’s damage cycle by eliminating the need to wait for the 5-second mark upgrade, thus making her output flow smoother. It also increases her All Elemental RES and Physical RES, improving Arlecchino’s survivability.
-
C4 Explanation
After Arlecchino absorbing a Blood-Debt Directive, this constellation shortens the cooldown of Elemental Burst by 2 seconds and restores 15 Elemental Energy. This reduces the need for Energy Recharge, increasing the likelihood of using Elemental Burst every rotation.
-
C6 Explanation
C6 greatly increases the damage of Arlecchino’s Elemental Burst, directly enhancing her burst potential and the overall benefit of using her Elemental Burst. This removes the limitation of Arlechinno’s damage being solely reliant on her Normal Attacks. Additionally, it boosts her CRIT Rate and CRIT DMG for both Normal Attacks and Elemental Bursts after using Elemental Skill, providing a simple and direct damage increase.
Arlecchino is a formidable Pyro DPS. By prioritizing her Normal Attack, selecting the right weapons, and equipping optimal artifacts, you can fully unlock her capabilities in combat. And for players who want to maximize Arlecchino's potential, don’t forget to top up Genshin Impact at LootBar.
↓ Short on Primogems and Genesis Crystals? Try LootBar! ↓
☛ About LootBar
LootBar is a global, professional, and secure gaming transaction platform offering services such as game top-ups, game coin trading, CD keys, and game items. Our mission is to provide a seamless and hassle-free experience for users worldwide, allowing you to enjoy your favorite games without delays or worries. We currently operate in Europe, America, Japan, Russia, Southeast Asia, and more.
☛ Why Choose Us?
- 100% Safe Transaction
We are committed to providing you with efficient, professional, and secure transaction services. We will provide security guarantees for the process and related data information involved in your transactions on the platform, 100% safe, please rest assured.
- 24/7 Support
We have a strong customer team and multiple ways to access consultations, quickly and conveniently answering any questions you have during the transaction process, including any support needed before, during, and after the sale.
- Full Refund Guarantee
LootBar provides you with competitive product prices and efficient delivery to your account. If the goods are not delivered or cannot be used after delivery, the platform promises to refund 100% and provide 100% financial security guarantee.